Pages

Showing posts with label DIY. Show all posts

Tuesday, August 16, 2016

The Next Chapter (For This Blog)

I'm still not sure how much I want to share publicly about my family life.  On the one hand, my child deserves the right to privacy and anonymity until she's old enough to decide what to share for herself.  But it's difficult (impossible?) to talk about life in early motherhood without mentioning your kid.

I wish I knew more mothers who hike, camp, climb, and travel with their babies.  Real-life friends are the best (swap belays between breastfeeding, anyone?), but even stories from the virtual world could be a source of learning, solidarity, and connection.

So I'm going to share just a little.  From my perspective only - not speaking for my daughter.  Using one of her nicknames, "Kick-Kick" or KK, instead of her real name.  Adding a watermark to any photo in which she appears, so the photo can't be re- or misappropriated.

Most importantly, remembering that I am a parent in real-time for my daughter, not for this blog, or for an online photo album, or for social media.

(Though I will always believe you can never have too many baby pictures!)

the climber's DIY baby swing:  rope, trad draw, 2 biners, and a pull-up bar
(bicep pullups, not diaper pullups)
(baby not included)

Monday, May 26, 2014

My (Mostly) DIY Hammock Camp

Dave and I recently upgraded our tent to a Tarptent.  It's super light (3.43 lbs, including ground cloth), but it's tiny - a tight squeeze for the two of us.  It's adequate for shelter, but in terms of comfort, it's no Chateau Dayan.

Enter the hammock.

The hammock was my bed in my closet-sized room in the lake house.  I thought it would make a comfortable, lightweight alternative to a tent (as long as I camp below treeline!)...  of course, after I made a few modifications.

The Hammock


Grand Trunk Ultralight.  Still not sure where I got it - K & T won't take responsibility - must have been the hammock fairy?

The hammock itself was the only part of this kit that was not DIY'ed.

The Suspension

The hammock came with some heavy paracord and heavy "S" rings.  The paracord munches through tree bark, and the system was a PITA to adjust.  First it's too loose, then it's too tight, then it's not centered - bah humbug!!

I replaced that bunk with a ridgeline (that's the rope connecting each corner of the hammock) to hold the amount of "sag" in the hammock steady.  The ends of the hammock are connected to whoopie slings (whoopie!), which are adjustable, spliced loops of rope.  And the whoopie slings attach to tree slings, which are straps of 1'' webbing to protect the tree.


In this photo, you can also see my little ridgeline organizer, where I store my glasses, ear plugs, and headlamp.

Together, the hammock and suspension weighs 1.13 lbs.

The Shelter

I'm the type of person that needs to sleep under a cover 12 months of the year.  I like having hidey-holes and being tucked out of sight.  I was willing to have a bigger (read: heavier) tarp, if it meant I had a retreat!

my diy tarp!  right door unstaked
My DIY tarp has two doors that can be staked inward or outward for privacy, warmth, and additional weather protection.  

It's made out of light-weight silicone impregnated nylon with a ridgeline made of "Lash It" (which does not stretch).  The guylines are attached to some shock cord, so when the nylon stretches overnight, I'll maintain a tight pitch.

Weighing in at 1.80 lbs, plus 0.23 lbs for stakes, this isn't the lightest tarp.  But I made it, and I love it!  

On trips when Davo and I expect bad weather, we're packing this in addition to the TarpTent, so we have plenty of space for gear, cooking, sitting, etc.

The Insulation 

One downside to hammock camping is that the air passing underneath your hammock removes heat from your body via convection.  Sleeping in an un-insulated hammock in temps below 70ish is chilly.


For a while, I was sleeping on top of my ThermaRest, but at 1.50 lbs, I wanted something lighter.  This closed-cell foam pad is 0.68 lbs and cost $8 - much better.

To keep the pad from sliding around in the night, I sewed two pockets into the hammock.  I also painted circles of 100% grippy silicone caulk onto the hammock fabric.  Works great!

The Bugnet

My bugnet is a big bag made of No-See-Um mesh that slips over the hammock and has a drawstring at the bottom.  Super simple.  Don't even have a photo of it.  Weighs 0.28 lbs.


Ironically, the weight of the tarp, hammock, bugnet, and stakes is 3.43 lbs - exactly the same as the TarpTent!  For the same weight, though, I get a TON more space, WAY more comfort, MUCH more versatility in camping locations, and the pleasure of having made my own gear, customized for me, at a fraction of the cost of buying it from a store.

Happy hanging!

Friday, May 23, 2014

My Turbo Cat II Stove

True statement about my husband:  the man can eat.  Dave can really put it away!  When we backpack, we bring a 2 liter pot, fill it completely with food, and he eats 3/4 of it.

Our typical powerhouse for backcountry cooking in quantity is the MSR Whisperlite, a random not-so-light pot, and assorted utensils.
this, people, this is what i have to work with...
Problem:  that stuff is heavy.  Even leaving the big pot behind and bringing a small MSR pot, it is still
3.82 lbs heavy, before fuel.

Enter the Turbo Cat II Stove.

revised cook kit - fuel bottle not shown (it's just a boring 12 oz soda bottle)

Materials:
*1 sheet of aluminum dryer vent - $4.50 at hardware store
*1 cake pan - $1 at dollar store
*1 "grease pot" - $5 online
*Epoxy - $6 at hardware store
*1 PBR can (already in fridge)
*1 tuna can (already in pantry)
*2 paperclips (found in couch)
*Fiberglass insulation scrap (from shed)
*1 metal hanger (found in closet)
*Drill n' bits (already have it)
*Pot handle (from MSR kit)

Total cost:  $16.50

Total weight:  1.00 lbs exactly (saving 74% of previous cook kit weight)

Satisfaction of having built my own stove:  pretty darn high.

The Stove
This little stove runs on denatured alcohol.  Denatured alcohol can be found just about anywhere and it's relatively non-toxic, so you pour only what you need for a trip into an old soda bottle.

The stove itself consists of a burn cup (PBR can bottom) with a fiberglass wick enclosed by a vent cup (tuna can).  Holes are punched in the vent cup and closed with a sliding ring to limit the amount of oxygen available to the flame - resulting in a nice, long, slow simmer (try that with a Whisperlite!).

The Accessories
The windscreen is made of aluminum dryer vent.  The coat hanger pot supports bisect the windscreen, holding the pot above the flame.  The cake pan made a heat reflecting, durable ground cover.

The pot is a "Stanco grease strainer."  It's flimsy aluminum and isn't for gourmet cooking...  but for a single reheated meal, it's perfect!  Just replace the lid with a paperclip and save another ounce.

man that pot handle looks huge... gotta be a better way...
So, does it work?  Sure does!

boiling boiling boiling
I estimate ~1 tablespoon of fuel gets 2 cups of cold water to a hard rolling boil in ~5 minutes.

I won't be able to cook for both Dave and I with the Turbo Cat II - I'd have to cook three meals for Dave and one for myself.  But!  For solo trips, this is perfect for me.  Lightweight, simple, nothing to break, nothing to pump, nothing to prime, and the perfect size pot.

Many thanks to John Bednar for publishing his plans online - they were perfect!  I improved on his plans slightly by using a can opener that pries the lid from the can, leaving it intact.  This resulted in a perfect stove bottom (simply epoxied the lid of the can back on, instead of cutting another piece of aluminum).

Thursday, May 22, 2014

Losing Weight: No Wonder Backpacking (Used To) Hurt

I'm planning at least one solo backpacking trip this summer - solo as in no Davo, solo as in I carry all of my own gear.  Typically, we split the "group gear," like the tent, stove, bear can, food, etc.  Knowing that I'm usually exhausted, even when splitting the group gear, I had no idea how I could manage on my own.

So, I did what I usually do when I'm trying to figure out a problem:  I made a list.

I listed every single item I would usually carry on a backpacking trip.  I weighed each of those items on my little kitchen scale that's accurate to 0.05 oz.  And I totaled up the weights.

Not including any clothing worn on my body, not including any consumables (food, water, fuel), not including variable weights (maps)...

...my base pack weight would be 32.65 pounds.  Remember, that's before 2 x 2 lb liters of water and 2-3 lbs of food per day.  If I didn't change what I was carrying, I could conceivably end up with a ~45 lb pack.  That's approximately 35% of my body weight.

No wonder backpacking hurts.  My pack needed a serious diet.

huuuge packs in the boundary waters...  (it's mostly sleeping bag, shhhh)

Fast forward 2 months and around $150.

My base pack weight is now 14.51 pounds, assuming it's not winter AND I don't need to carry a bear can AND I'm going to be slightly colder than usual.  Not ultralight, but a huge improvement for very little investment.

I cut down my pack weight by considering every single thing I used to carry and asking the following questions, in order:
  1. Is this necessary?  (med kit = yes, inflatable pillow = no)
  2. Can something already in the pack perform the same function?  (e.g. bandana = filter for water floaties)
  3. Can I carry less, repackage, or literally cut off the bits I don't use?  (e.g. bye bye, toothbrush handle)
  4. If not, can I make another DIY version that's lighter?  (introducing the cat can stove!)
  5. If not, can I find a commercial version that is within my (very small) budget?  (only my tent stakes and hammock pad made it this far down the list)
What does this look like in practice?

From this (Dave has most of the pack weight on the last day - imagine me carrying 50% of his stuff):
i still have that scar on my leg, too...
To this:
yes, that is actually my backpacking pack.  plus blue sleeping pad, seen standing on floor
Pretty cool!  I'm looking forward to taking it out for a test hike this weekend.  I'm especially proud of my hammock/ shelter and stove, so I'm going to show them off in their own posts.

Tuesday, May 8, 2012

It's Just As Tiring as Climbing: Weaving on a Backstrap Loom

In Guatemala, textiles are everywhere. Especially in the highlands, where I've spent nearly all my time, the majority of women still dress in traje (traditional clothing). Men generally dress in western clothing.  It's definitely common to see a woman dressed like a photo in National Geographic walking around with a guy wearing Levis, a tee-shirt, and a baseball cap.  I guess it's because there has been more pressure on men to assimilate into western culture in order to work, whereas the Guatemalan woman's domain has remained at home.
women in traje selling flowers on the stairs of san tomas church in chichicastenango
Anyway, each place has its own style of corte (skirt) and huipile (blouse). Many (most?) of these pieces are still woven and decorated by hand, and they're beautiful, intricate, and colorful. It's mesmerizing, especially for me, because I enjoy dabbling in fiber arts and have a wardrobe of mostly earth-tone, solid color, boring clothing (no blingy flourescent pink or sequins).

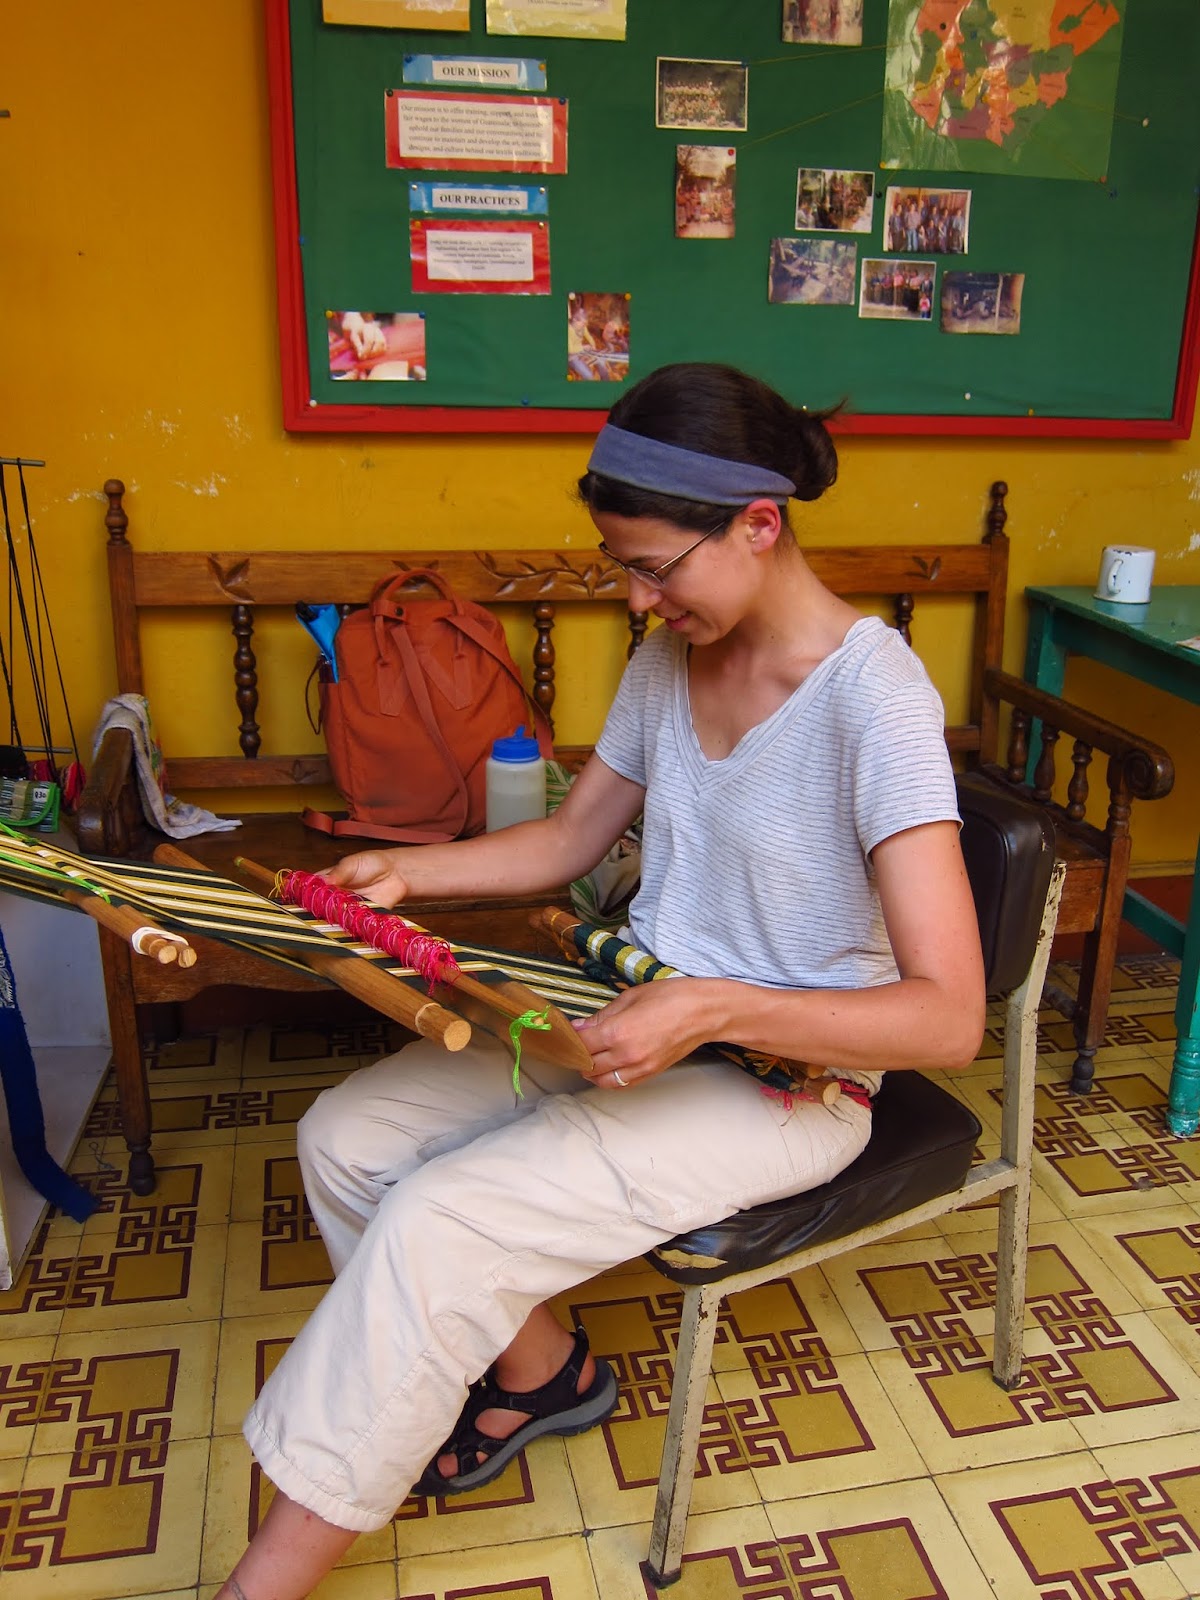
I love traveling because I love learning/ experiencing/ appreciating things that I can't really learn/ experience/ appreciate at home. One of the things I wanted to do in Guatemala was learn how women make these beautiful textiles. I hooked up with Trama Textiles, a cooperative of women tejedores (weavers) in Xela for a 10-hour crash course in using a backstrap loom for weaving.

It took about three hours of prep work before I could even start weaving, then about six hours to weave a simple six-foot scarf. And let me tell you, I am so glad that I have well-developed shoulder and back muscles from climbing big rocks, because my arms were tired by the end!

Here's how the entire process of weaving a scarf, from start to finish.  If the text and pictures don't make any sense, just skip to the video at the end!

Step 1: Select your colors, one main color (green) and two contrasting colors (white and gold).

Step 2: Put the skeins of thread onto two rotating arms (known as a devanadera) and wind two threads together into a ball (devanar, to wind).

Step 3: Make your design. In my case, I had 180 threads to divide into a pattern of stripes.

Step 4: Wind the threads around a warp board (urdidor). Looking down at the urdidor, start at the upper right, cross down the inside, wrap around the bottom, and cross up the outside to the upper left. From the upper left, cross down the inside, wrap around the bottom, and cross up the outside. This is warping, or urdir.

The number of threads of each color in your design corresponds to the number of wraps you make. You'll end up with a stack of threads crossed over each other at the top pegs of the urdidor, like this:

Step 5: Set up (armar) the loom (telar de cintura). Apparently this takes a while, and can be a bit difficult, so my teacher did it for me while I went to lunch.

The top loops of the thread are wrapped around two dowels. There is another dowel, called a pulito, that holds up half of the threads. Beneath the pulito there's another dowel called a laviadura, whose threads hold up the other half of the threads.

Step 6: Strap yourself into the loom by putting the belt (cintura, though I think there's another name for it) around your waist and wrapping its threads around the bottom of the loom.

Step 7: Weave! ¡Teja! Weaving is divided into two processes, proceso uno and proceso dos.

Proceso uno:
Lift the laviadura, raising one half of the threads.

Insert the torpidor, an oblong piece of wood, under this half of the threads.

Pack down the threads already woven.

Rotate the torpidor, raising this half of the threads.

Pass the trama, a baton with thread wrapped around it, under this half of the threads. The thread on the baton becomes the weave threads (in contrast to the warp threads, which go lengthwise along the scarf).

Remove the torpidor.

Proceso dos
Slide together the laviadura and the pulito. This raises up the other half of the threads! Neat!

Insert the torpidor under the other half of the threads.

With the torpidor, pack down the thread that you just placed with the trama in proceso uno.

Rotate the torpidor to lift the other half of the threads.

Pass the trama under the other half of the threads.

Remove the torpidor. Start from the beginning of proceso uno again, using the laviadura to lift the first half of the threads!

If that didn't make any sense, here's what the sequence looks like when you put it all together:


Step 8: When you reach the end of the warp threads, cut the piece from the dowels and tie the lose ends in decorative knots.

All done!